EPF Field-Ops No. 33 Guide: Search for the hidden device and then deactivate it

16 02 2011

The latest Club Penguin EPF Field-Op mission is out today, No. 33.

1. Answer your spy phone, and report for duty in the Command Room.

2. Click the yellow Field-Ops screen to learn about your mission:

You are to search for a device Herbert P. Bear claims to have hidden in a box and then deactivate it:

3. Find a Portal Box:

  • Either head to the Beach for the Portal Box by the Lighthouse …
  • … or find an igloo with Portal Box furniture, which was released for April Fool’s day in 2009. Go on a busy server, and go from igloo to igloo till you find one:

4. Enter the portal to reach the Box Dimension, and walk to the box in the far left corner:

5. Answer your spy phone.

6. Destroy the circuits by matching the shapes:

fo-destory-circuits.png (400×253)

Field-op complete.

For help with the latest field-op, check our EPF field-ops page.

Waddle on!

Mr Snowball3

Note: I don’t have a Portal Box! Why didn’t I buy one!


Mission 11: The Veggie Villain step-by-step guide

11 11 2010

Here are step-by-step instructions for completing Mission 11: The Veggie Villain on Club Penguin.

MISSION 11: THE VEGGIE VILLAIN

1. Talk with Gary the Gadget Guy.

He asks you to guess the name of the seeds Herbert P. Bear dropped at the end of Mission 10.

2. Guess anything. You eventually pick the right answer.

Gary asks you to go the Gift Shop and investigate.

3. Using your spy phone, teleport to the Gift Shop.

4. Look around, and talk to Rookie.
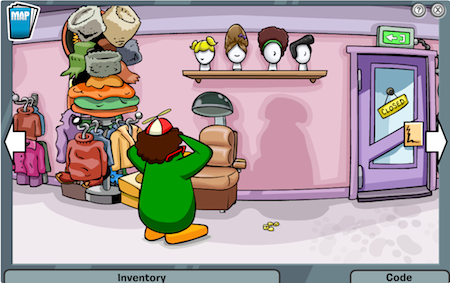
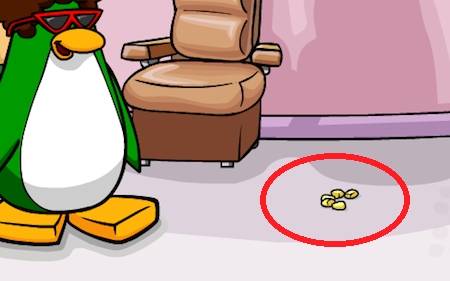
5. Pick up the seeds of corn to the right of Rookie, and put them in your inventory.
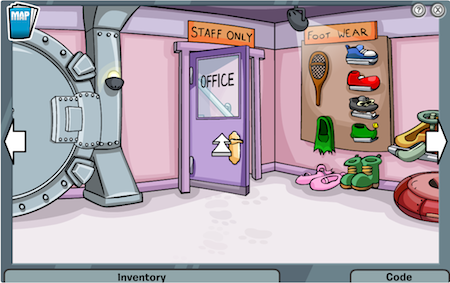
6. Go to the Office upstairs.
7. Look around, and talk to Jet Pack Guy.

8. Pick up the corn seeds under the desk, and put them in your inventory.
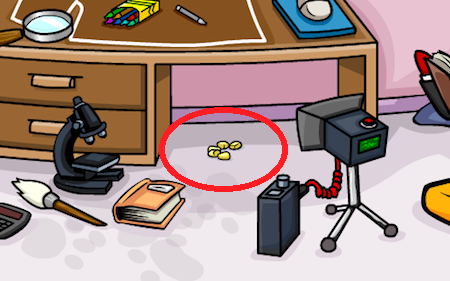
9. Teleport anywhere, but the Sport Shop is a good spot.

Your spy phone rings.

10. Answer your phone.

It’s Gary, telling you to report back to HQ. The phone goes dead before he can finish, however.

If you try to teleport to HQ now, you instead will be teleported to a random spot on the island and see a message that the transporter is broken. Through the rest of the mission, you will need to use the map to get around the island.

11. If you are already in the Sport Shop, enter the third changing room.

12. Talk to Gary again.

He tells you someone is trying to take over the PSA main computer. Herbert appears on the monitors again. Gary then locks down the PSA mainframe and tells you to shut down Herbert’s broadcast in the Ski Village.

13. Make your way to the Lighthouse.

14. Grab the DVD under the piano, and put it in your inventory.

15. Grab the spray bottle and cloth on the speaker, and put them in your inventory.
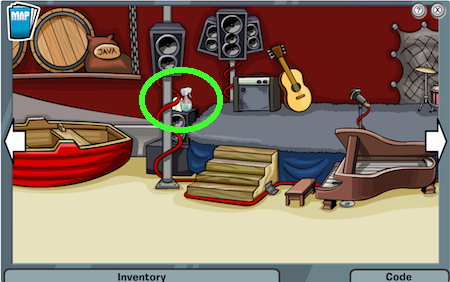
16. In your inventory, use the spray bottle and cloth on the DVD to clean it:

  1. Click the spray bottle on the right of the screen, and squirt cleaning spray on the DVD until you get a message that you’ve sprayed enough.
  2. Click the cloth on the right, and click around on the DVD, wiping it perfectly clean.
  3. Put the clean DVD back in your inventory.

17. Before you leave, grab the empty can by the stairs and put it in your inventory.
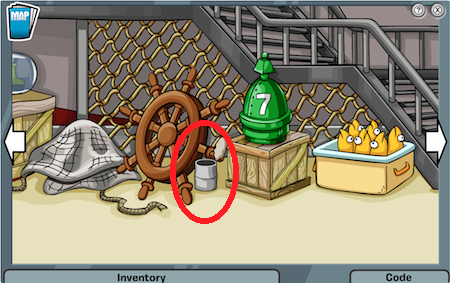
18. Make your way back to HQ, and go in the Gadget Room.

If you pass through the Ski Village, you see a large screen.

19. Use the Test Chamber to fill the can with water and then freeze the water:

  1. From your inventory, put the empty can on the conveyor belt to the right.
  2. Click the handle with the red knob to move the can into the chamber.
  3. Click the water button in the middle to fill the can with water.
  4. Click the snowflake button on the left to freeze the contents of the can.
  5. Click the handle with the red knob again to move the frozen can out of the chamber.
  6. Pick up the disk of ice, and put it in your inventory.


20. Go to the Beacon.

21. Ask the penguin what he is doing and if you can help, somehow.

(Is this Rory?)

22. From your inventory, give the ice disk to the penguin.

23. Take the lens on the ground by the telescope, and put it in your inventory.
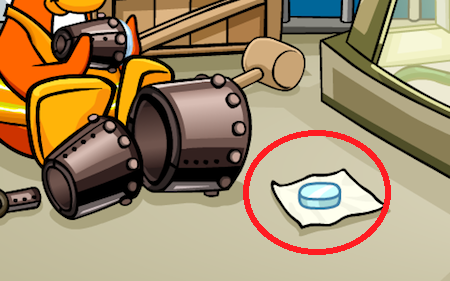
24. Go to the Ski Village.

You see a giant screen with Herbert projected on it, three penguins seated in front of the screen, and Rookie.

25. Talk to the brown penguin, seated in the middle.

He says he sat on his glasses, breaking them.
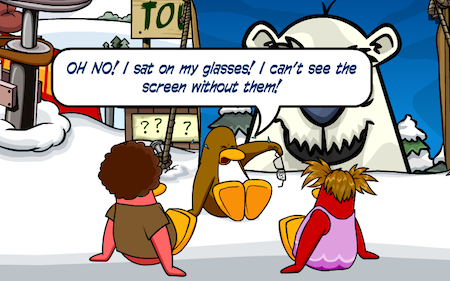
26. Tell him you will help find new lenses for his glasses.

27. From your inventory, take the lens and put it on the brown penguin to repair his glasses.

28. Talk to Rookie.

29. Click the projector to the right of the screen.
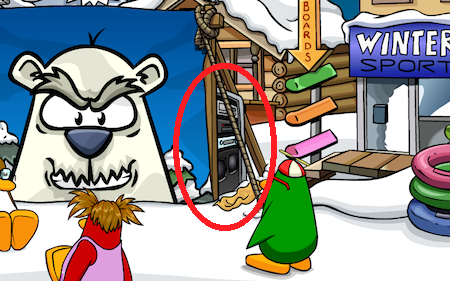
You see a DVD player and transmitter equipment.

30. Click the open/close button on the left side of the player to slide out the disc tray.
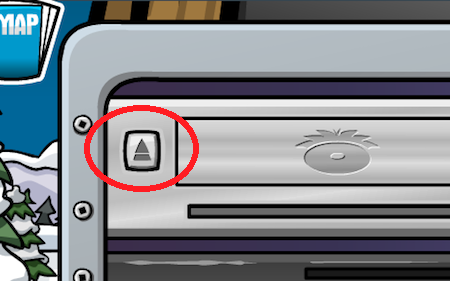
31. From your inventory, put the DVD in the disc tray.

32. Click the 0pen/close button to slide the DVD into the player.

The Halloween classic The Night of the Living Sled begins to play, but Herbert continues to talk.

33. Click the screen, and talk with Rookie.

34. Click the projector to the right of the screen again.

35. Take your spy phone from your inventory, and click the flashing-red light at the top of the phone.

36. Click the wrench that pops out, and use it on the satellite box to the right.
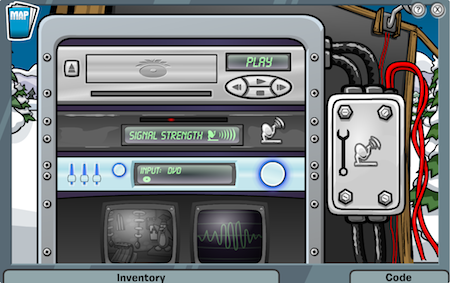
The face of the box falls off.

37. Click the now-exposed box to see a close-up.

38. You need to solve the code to discover where the signal is coming from.

Select four colors in the top row, and click the Check button. Note which colors you got right, and then make your selections in the second row. Keep going by process of elimination till you solve the code. The correct colors are different each time you do the mission. You can read the instructions over in the bottom-right corner if you get confused.

39. Talk to Rookie.

40. Make your way to the Mine.

41. Look around, and enter the cornfield.
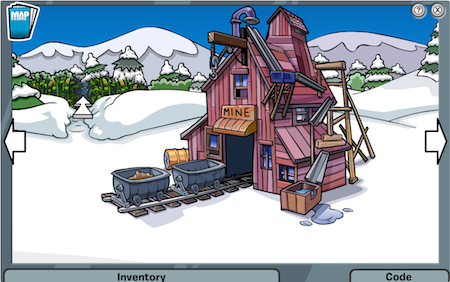
As you find your way through the cornfield, look for four scraps of paper and a wood plank.

As you find each item, put it in your inventory. You may need to go down all the trails to find the paper scraps and plank.

Making your way through the cornfield can be confusing. If you get totally lost, click the map to return to the Mine and start again.

42. Follow the trail of popped corn till you come to the first piece of paper.

43. Put the paper in your inventory.

44. Go down the path to the right the paper was on.

You see the second piece of paper.

45. Pick it up, and continue down the path to the right.

You see the third piece of paper.

46. Pick it up, and go down the path to the left.

You see the fourth piece of paper and the wood plank.

47. Put them in your inventory.

48. In your inventory, drag the four pieces of paper on top of each other to repair the note.

49. Click the note to read how to grow super corn.

You can retrace your steps, but I think it might be easier to go back to the Mine and re-enter the cornfield.

50. On your map, return to the Mine and re-enter the cornfield.

51. Follow the trail of popped corn, like before.
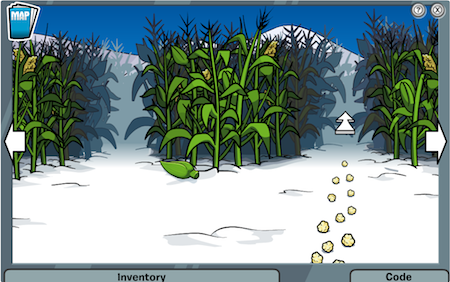
52. When you see the yellow watering can, take the path just to its right.

53. For the next path, follow the trail of corn kernels.

54. Next, take the path just to the left of the bag of fertilizer.

55. Next, take the path just to the right of the hot sauce.
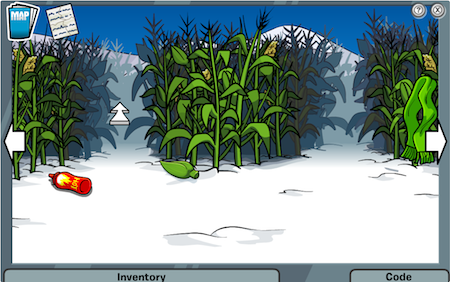
56. Finally, take the path just to the right of the sack of coffee beans.
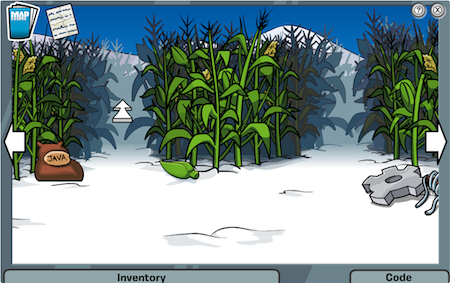
You come to a stream.

57. From your inventory, take the plank and put it on the stream.

58. Cross the stream.

You come to a hill, with a ladder high up, out of reach.

59. From your inventory, take the corn kernels and put them on one of the torches.

The popped corn strikes and turns the handle, lowering the ladder.

60. Climb the ladder.

You see Herbert, sitting at a computer, talking on a microphone. Klutzy seems to be playing a video game?

61. Click Herbert to talk to him.

62. While Herbert and Klutzy are laughing, unplug the computer.
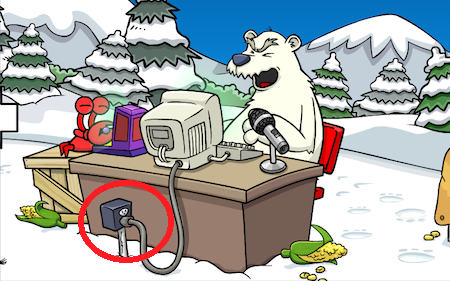
63. Talk with Herbert.

He teleports you to HQ, along with a souped-up popcorn popper with an ominous timer.

64. Talk to Gary and Rookie.

Herbert again appears on the monitors.

65. Look around for the green cabinet with the row of books, under the map.

66. Click the yellowy-orange book, in the middle.
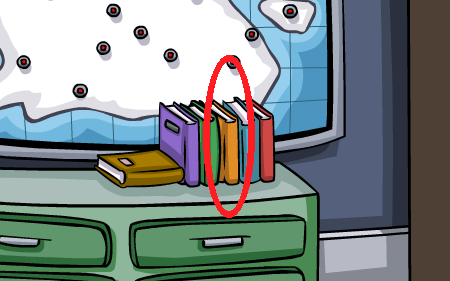
67. Click the gadget that slides out of the larger cabinet to the right.

68. Solve the puzzle.

Match the colors in the inner ring with the colors in the outer ring by clicking the colors in the middle and inner rings. Shift colors between the inner and middle rings to align them.

The color code in the image below is nearly solved. I just need to click the yellow ring to shift it down, as shown with the arrow.

When you crack the code, a penguin pops out of the cabinet.

69. Talk to the penguin, whom Gary calls Dot.

Dot teleports everyone out of HQ right before the popped corn destroys it.

After a quite bit of talking, you learn that the PSA is finished and its files and investigations are being transferred to a secret co-agency, the Elite Penguin Force.

70. Get your medal and gift from Dot.

You’re done!

71. After the mission is complete, go to your Awards area.
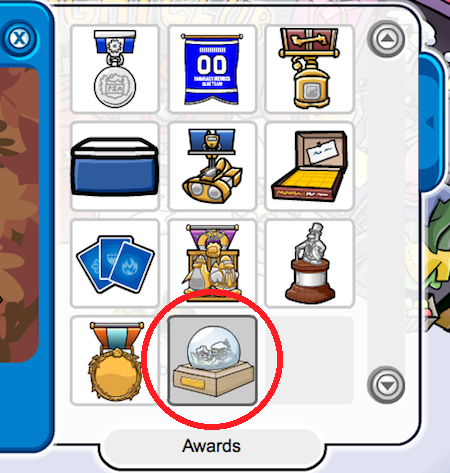
72. Click the snow-dome award you just got from Dot.

73. Click the Shake button to shake the snow dome.

74. Click the red button on the right to reveal a pair of spy goggles and a note from Dot.

Did I miss anything?

If you want to see how to do other secret agent missions, go to our Mission Guide page: https://abominablegovernment.wordpress.com/psa-mission-guides/.

Waddle on!

Mr Snowball3

Notes: Did you notice how many times someone mentioned eyeglasses in this mission? I counted four times, not including the spy goggles after the mission (click to enlarge the images below):

Gary

Rookie

Jet Pack Guy

Brown Penguin

Did you find other mentions of glasses?

Finally, the mission name is The Veggie Villain, so I’m guessing Club Penguin is referring to corn as a vegetable. But corn is usually not considered a vegetable but is a grain or possibly even a fruit. The Grainy Villain doesn’t sound as interesting though 🙂


Mission 10: Waddle Squad step-by-step guide

10 11 2010

Here are step-by-step instructions for completing Mission 10: Waddle Squad on Club Penguin.

MISSION 10: WADDLE SQUAD

1. Talk with Gary the Gadget Guy.

Your mission is to work with Jet Pack Guy and Rookie—both of whom you met in earlier missions.

2. From the box of odds and ends to the right of Gary, take the solar panel and put it in your inventory.

3. Using your spy phone, teleport to the Beach.

4. Look around, and talk to Jet Pack Guy, who is not wearing his jet pack.

He tells you his jet pack has broken down and is out of fuel.

5. Go in the Lighthouse, and look around.

6. Grab the barrel, and put it in your inventory.

7. Return to the Beach, talk to Jet Pack Guy again, and tell him you found cream soda.

He tells you to divide the cream soda into two containers, each containing four units of cream soda.

8. From your inventory, give the barrel of cream soda to Jet Pack Guy.

You see three beakers, with little labels next to them marked 8, 5, and 3.

  1. Pour liquid from the left beaker into the middle beaker.
  2. Pour liquid from the middle beaker into the right beaker.
  3. Pour liquid from the right beaker into the left beaker.
  4. Pour liquid from the middle beaker into the right beaker.
  5. Pour liquid from the left beaker into the middle beaker.
  6. Pour liquid from the middle beaker into the right beaker.
  7. Pour liquid from the right beaker into the left beaker.

If you get confused, click the bottle with the Help note rolled up inside to see directions for getting four units of cream soda into two containers.

Jet Pack Guy soars off.

9. Teleport to the Dock.

10. Talk to the green penguin near the boat with the rope.

11. Ask if he has any rope.

Surprisingly, he just gives you the rope.

12. Put the rope in your inventory.

13. Teleport to the Gift Shop, and talk to the shopkeeper.

14. Tell him you’d be happy to help him, and then put the two boxes and table beside him in your inventory.

15. Go outside to the Town, take the table from your inventory and set it up to the right of the store.

16. From your inventory, take the two boxes and put them on the table.

17. Go back in the Gift Shop, and talk to Rookie.

The Magnet 3000 is causing him problems.

18. From your inventory, take the solar panel and put it on the magnet’s power cord.

You see a circuit board.

19. Use the blue soldering iron to complete a path between each of the three pairs of colored circles. If you mess up, use the red solder sucker to erase mistakes.

Your finished circuit board should look something like this:

20. Teleport to the Night Club.

21. Take the rope from your inventory, and put it on the pulley.

The rope is attached to the cage and winch.

22. Click the red lever.

The winch shoots off sparks.

23. Take your spy phone from your inventory, and click the flashing-red light at the top of the phone.

24. Click the wrench that pops out, and use the wrench on the bolts on the front on the winch.

25. Click the front of the winch.

You see five gears on the bottom of the box.

26. Fit the gears on the spindles to fix the winch and set the trap:

The gears may fit together differently each time you do the mission.

27. Teleport to the Dock.

Your spy phone rings.

28. Answer it.

Oddly, it’s Jet Pack Guy, telling you to head to the Dock, although you are already there.

29. Look around till you spot Klutzy waving a decoy Herbert.

30. Your spy phone rings again.

It’s Rookie, reporting Herbert is at the Night Club.

31. Return to the Night Club.

You see Herbert with the golden puffle.

32. Flip the red handle on the winch to trap Herbert.

Herbert easily lifts the cage and casts it aside.

33. Click Herbert.

Your spy phone rings.

34. Answer your spy phone.

It’s Gary, telling all agents to move in. The Magnet 3000 breaks through the wall, attracted by the golden puffle.

35. Click and hold the three night-club spotlights to point them at the solar panel.

The magnet now attracts the cage, again trapping Herbert. After some hullabaloo, the mission ends.

36. Be sure to collect your medal and gift.

You’re done!

Did I miss anything?

If you want to see how to do other secret agent missions, go to our Mission Guide page: https://abominablegovernment.wordpress.com/psa-mission-guides/.

Waddle on!

Mr Snowball3


Mission 9: Operation: Spy & Seek step-by-step guide

5 11 2010

Here are step-by-step instructions for completing Mission 9: Operation: Spy & Seek on Club Penguin.

MISSION 9: OPERATION: SPY & SEEK

1. Talk with Gary the Gadget Guy.

He asks you to gather intelligence on Herbert P. Bear’s whereabouts and find out as much as possible about his plans.

Gary’s plan is to place three tracking devices across the island, which should help locate the problematic polar bear.

You have to do some work on the devices to get them ready, and then you can install them.

Gary marked with a red X on your map the best locations to install the devices.

2. Put the three tracking devices, the yellow duck, and the plans for the kite on the wall in your inventory (marked with red arrows, below).

3. Using your Spy Phone, teleport to the Ski Lodge.

4. Talk to the two penguins at the Find Four game. (This is my favorite game!)

They are missing game pieces.

5. Tell them you will keep an eye out for the missing pieces.

6. Collect the missing game pieces:

  1. On the first rung of the ladder up to the Lodge Attic.
  2. On the stool beneath the telephone.
  3. On the windowsill.
  4. Between the chimney and the rocking horse, in the Lodge Attic.
  5. On the table by the typewriter, in the Lodge Attic.
  6. On the table by the phonograph, in the Lodge Attic.
  7. On the crate by the lamp, in the Lodge Attic.
  8. On the crate between the couches, in the Lodge Attic.

7. While you are in the Lodge Attic, pick up the piece of string sticking out from under the rug and put it in your inventory.

8. Go back downstairs, and give the game pieces to the penguins.

9. Teleport to the Forest, pick up the sticks on the snow, and put them in your inventory.

10. Teleport to the Ski Hill.

11. In your inventory, put the kite plans on the sticks on then put that on the string to make a kite.

12. In your inventory, put the kite on a tracking device.

13. Put the kite-tracking device on the pole.

14. Teleport to the Plaza, and talk with the two penguins.

The red puffle, Ed McCool, demonstrates puffle bowling. The blue puffle, Destructo, looks alarmed.

Next, the blue puffle blows a bubble, which bursts, getting gum everywhere.

The two penguins ask for your help.

15. Tell them, sure, you’d be happy to help.

16. Click the gum stretched between the two penguins to free them.

17. Ask if you can take the gum.

18. Put the wad of gum in your inventory.

19. Teleport to the Dock, and talk to the green penguin working on the boat.

20. Offer to help.

21. Grab the wooden handle of the starter cord, and give it a pull to start the motor.

22. Ask if you can borrow the bicycle tire pump.

23. Put the air pump in your inventory.

24. Teleport to the Iceberg.

25. In your inventory, put the gum on the duck to patch the hole and then use the pump on the duck.

26. Grab the pump’s handle, and pump air into the duck.

27. Click the inflated duck on a transmitter in your inventory.

28. From your inventory, click the duck-transmitter and put it in the water, to the right of the outcropping of ice.

29. Teleport to the Mine Shack, and talk to the penguin on the roof about the mine track and cart.

Rory says he has to first make some repairs.

30. Ask if there is anyway you can help.

He asks if you can fix the troughs on the shack.

31. To get started, click the troughs on the right side of the shack.

32. To fix the trough, click and drag the beams of wood to rearrange them so the trough can tilt down to the left. (See below for how to arrange the beams.)

33. Once you have the beams arranged, click the left side of trough and pull it down.

34. Talk to the penguin again, and offer to fix the mine cart.

35. Click the tipped-over cart to set it back on the track.

36. Click the welding gear.

37. Click and hold the welding torch over the cracks to fix them.

Have fun welding. Spell you name with the welding torch!

38. Put the last transmitter into the cart, and then click the cart to send it down the mine.

G calls you on your spy phone.

39. Talk to G, and then report back to HQ.

40. Talk to G.

He gives you the Binoculars 3000.

41. Put the Binoculars 3000 in your inventory.

42. Teleport to the Ski Lodge, and go through the Gone Fishing door.

43. In your inventory, click the Binoculars 3000, and then click the far side of the ice pond.

You see Herbert with Klutzy, trying to start a fire.

Your spy phone rings.

44. Talk to G.

He tells you to go across the pond and attach the binoculars to the spy phone.

45. Cross the pond.

You are in Herbert’s chaotic camp. If you click the blue drawing, you will see a puzzling message.

46. Grab the spy phone on the snow, and combine it with the Binoculars 3000 in your inventory.

47. Go to the left, clicking trees till you receive a message that says “This tree is just perfect for the camera.


48. From your inventory, put the surveillance binoculars/phone in the tree.

Your spy phone rings again, and G says the binoculars/phone is transmitting.

49. Teleport back to HQ, talk with G, and then observe Herbert.

50. Be sure to collect your medal and gift.

You’re done!

Did I miss anything?

If you want to see how to do other secret agent missions, go to our Mission Guide page: https://abominablegovernment.wordpress.com/psa-mission-guides/.

Waddle on!

Mr Snowball3

Note: The two puffles you meet in the Plaza are named Ed McCool (the red one who bowls) and Destructo (the blue one who chews gum).


Mission 8: Mysterious Tremors step-by-step guide

4 11 2010

Here are step-by-step instructions for completing Mission 8: Mysterious Tremors on Club Penguin.

MISSION 8: MYSTERIOUS TREMORS

1. Talk with Gary the Gadget Guy about the earthquakes.

He tells you the most recent tremor started at the Dock.

2. Before you leave, grab the propeller hat on the coatrack to the left of G and put it in your inventory.

3. Use your spy phone to teleport to the Dock.

Herbert P. Bear and Klutzy the Crab pop up out of the snow, in a huge drill.

4. Talk to Herbert.

Herbert talks about a map, which Klutzy snips in half. The two map pieces blow away.

5. Pick up the green lantern Klutzy left, and put it in your inventory.

6. Make your way to the Town.

You see the two map pieces float by.

7. Talk to the worried-looking pink penguin.

8. Go in the Coffee Shop next, and talk with the barista.

9. Offer to help clean up, and click one of the cookies on the floor to pick them up.

10. Put the cookies in the green cookie jar.

11. Take the cookie the barista offers you, and put it in your inventory.

12. Go back outside.

Note that part of the map Klutzy snipped in half is stuck in the Nightclub sign.

13. From your inventory, give the green puffle the propeller hat.

He puts it on.

14. Now give the green puffle the cookie.

He eats the cookie. As he soars off, the map piece in the sign floats to the ground.

15. Pick up the map piece, and put it in your inventory.

Earlier, the other map piece floated toward the Snow Forts.

16. Go to the Snow Forts.

You see the map piece float by and get stuck in a flag pole.

17. Click the piece.

It sails off toward the Plaza.

18. Head to the Plaza.

You see the map piece sail into a penguin’s newspaper.

19. Talk to the green penguin queued for The Stage.

He won’t give you his newspaper but says he’s like a double-meat pizza, extra grey fish. (Blech!)

20. Go in the Pizza Parlor, and ask the waiter for a double-meat pizza with extra grey fish please!

21. Put the pizza box he hands you in your inventory.

22. Go back outside, and from your inventory, give the pizza box to the green penguin.

23. Ask the penguin for the newspaper.

24. Put the newspaper in your inventory.

25. Click the newspaper in your inventory, and you get the other half of the map.

26. Put one piece of the map on top of the other map piece in your inventory.

If you want, you can click the completed map to see the tunnel directions.

27. Teleport back to HQ, and go in the Gadget Room.

28. Report back to Gary.

The conversation seems a bit confusing, because G talks about searching for the map, but you have it with you.

29. Grab the hammer on the wall to the right of G, and put it in your inventory.

30. Look around the Gadget Room, and click the purple air tank.

31. Ask Gary about Super Helium, and ask him if you can take it.

32. Put the tank in your inventory.

33. Teleport to the Lighthouse.

34. Take the net, and put it in our inventory.

35. Talk to the orange penguin on the stage, and ask him if you can take some balloons.

36. Put the box of balloons in your inventory.

37. Teleport to the Sport Shop.

38. Put the box of tent pegs in your inventory.

39. Teleport to the Town.

40. From your inventory, take a balloon from the balloon box and put it on the super helium tank.

41. Click the inflated balloon on the Gift Shop to attach it.

The Gift Shop floats up a bit.

42. Quickly, take the net from your inventory, and put it under the floating Gift Shop, a bit beneath the door.

43. Take the tent pegs, and put them on the net, again right underneath the door.

44. Take the hammer, and tap the pegs into place.

If it works, the net supports the Gift Shop.

This can be tricky, trying to figure out where to place all the items. If you mess up and the Gift Shop sinks before you are done, go back to the Lighthouse, grab another net, and try again.

45. Now, teleport to the Dock, and look around for the hole Herbert and his drill popped out of.

46. Enter the hole, and look around for two tunnels.

47. Click the map either in the top-left part of your screen or in your inventory to see which tunnel to take.

48. Enter the first tunnel, following the directions on the map.

The directions are different each time you do the mission.

The tunnel is dark.

49. Click the lantern in your inventory to turn it on and light your way.

If you are a member, you can turn on your night-vision goggles instead.

50. Continue to follow the directions on the map.

If you correctly followed the map’s directions, you come to a spot right beneath the Gift Shop. Ahead, you see another tunnel.

If you took a wrong turn, you end up back at the beginning, so start again.

51. Enter the tunnel.

You see Herbert’s drill.

52. Take your spy phone from your inventory, and click the flashing-red light at the top of the phone.

53. Click the wrench that pops out, and use the wrench on the gear in the drill.

54. Put the gear in your inventory.

55. Enter the opening to the Boiler Room.

You see Herbert doing something to the boiler.

56. Click Herbert.

He talks with Klutzy.

57. Talk with Herbert.

He whacks the boiler with a wrench, and it starts to overheat.

58. Answer your spy phone.

59. Talk with Gary.

He tells you to fix the boiler.

60. Click the boiler to start repairing it.

You need to reconnect the pipes, hooking up pipes from the top-left to the bottom-right pipe.

61. To move a pipe, first click the pipe you want to move and then click the square you want to move the pipe too.

You can create any path you want with the pipes, as long as you eventually connect the top-left pipe to the bottom-right pipe.

62. Answer your spy phone again.

It’s Gary, asking you to report back to HQ.

63. Teleport back to HQ, and talk with Gary.

Keep talking with Gary until you can tell him you recovered the clock tower’s prime gear.

64. Hand Gary the gear.

65. Be sure to collect your medal and gift.

You’re done!

Did I miss anything?

If you want to see how to do other secret agent missions, go to our Mission Guide page: https://abominablegovernment.wordpress.com/psa-mission-guides/.

Waddle on!

Mr Snowball3

Note: You may have noticed in the Lighthouse barrels of cream soda. If you want, you can take a barrel, make your way through the cave, and once you come to the sunken Gift Shop, shake the barrel and place it under the Gift Shop to help lift it up. The shop seems to float fine with just a super-helium-filled balloon, however, so I didn’t include that in the instructions. Go ahead and try shaking a cream-soda barrel to lift the shop if you want.


Mission 4: Avalanche Rescue step-by-step guide

26 10 2010

Here are step-by-step instructions for completing Mission 4: Avalanche Rescue on Club Penguin.

MISSION 4: AVALANCHE RESCUE

1. Talk with Gary the Gadget Guy.

Keep talking with G until you can ask him, “Where can I find the life preserver shooter?”

2. Click the Gadget Room security door to enter the Gadget Room.

3. Find the life preserver shooter on the top shelf of the case, and put it in your inventory.

4. Use your spy phone to teleport to the Lodge.

5. To the right of the back door that leads to the ice-fishing hole, grab the fishing pole and put it in your inventory.

6. Teleport to the Light House.

7. Grab the rope hanging out of the rowboat, and put it in your inventory.

8. Climb the stairs to the Beacon, and find the telescope.

9. Take your spy phone from your inventory, and click the flashing-red light at the top of the phone.

10. Click the wrench that pops out, and click the wrench on the bolt that is attaching the telescope to the railing.

11. Put the portable telescope in your inventory.

12. Teleport to the Sport Shop.

13. Remove the brown belt from the lime-green penguin mannequin (or would that be penguinequin?), and put it in your inventory.

14. Exit through the door, out to the Ski Village.

15. Look around, and you see a brown penguin crying.

16. Talk to the penguin.

The penguin tells you the ski lift is broken and asks if you know how to fix it.

17. From your inventory, take the brown belt, click it on the ski lift, and attach it to the motor.

18. At the foot of the ski lift, pick up the white fur and put it in your inventory.

19. Go back into the Sport Shop, and go through the door to Gary’s Room.

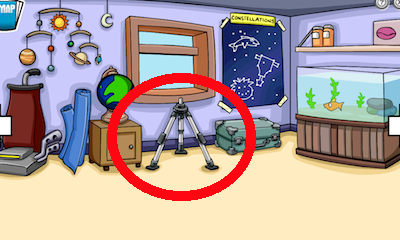
20. Look around to find the tripod in front of a window in Gary’s Room.

21. From your inventory, take the telescope, and click it on the tripod.

22. Click the telescope to look through it.

You see a bunch of paths leading from the top of the mountain down to four stranded penguins.

Your task is to make your way down the paths to the four penguins and rescue them. The correct path is different each time you do the mission, so grab a pencil and write down the path that leads to the penguins. It can be a little tricky, but the easiest way is to work from the base of the mountain up to the top—from the four penguins back up—and note which paths to take: left, center, or right. It’s kind of like doing a maze in reverse. You also can just guess, if you can’t be bothered.

23. On a piece of paper, write down which paths lead from the top of the mountain down to the four penguins.

24. Teleport to the Mountain.

Note the odd footprints.

25. Click the run to start your trip down the path.

26. Each time you come to an intersection of paths, look at your notes to see which is the right path to take.

At the bottom of the path, you see crashed tubes and a broken fence.

27. In your inventory, put the fishing pole on the life preserver shooter …

…and then put the rope on the contraption.

28. Click the fishing-pole-life-preserver-shooter contraption on the edge of the cliff.

You see the four penguins and a life preserver tied to a rope.

29. Click the tangled branches to the right to clear them away with the preserver.

30. Click the first penguin, in the middle, to have it grab the life preserver.

31. With the first penguin clinging to the preserver, click the penguin over on the right.

You now have two penguins hanging from the preserver.

32. Position the two penguins over the branch the first penguin was standing on, and click the branch.

You place a penguin on the branch. The penguin bends the branch out of the way, so the other penguin still on the preserver can reach the third penguin.

33. Click to the right of the penguin on the branch.

The penguin on the preserver drops down and picks up the third penguin.

34. Click the penguin on the branch to collect the three penguins on the preserver.

35. Over to the left, click the ledge three times—to the left of the boulder—to safely set the three penguins down.

The three penguins push the boulder over the ledge.

36. Now, click the three penguins again to collect them on the preserver.

37. With the three penguins on the preserver, click between the ledge and the branch to swoop down and rescue the fourth penguin.

38. Back on the mountain top, put away your contraption, talk with G again, and give him the white fur.

39. Be sure to collect your medal and gift.

Note: You can click the Get Letter button, but you won’t receive one. The letter was from the PSA, thanked you for your expert work, and assured you the PSA would contact you again when the time is right. The letter would then self-destruct. The letter was removed from the mission in 2015.

You’re done!

Did I miss anything?

If you want to see how to do other secret agent missions, go to our Mission Guide page: https://abominablegovernment.wordpress.com/psa-mission-guides/.

Waddle on!

Mr Snowball3


Video walkthrough for Mission 1: Case of the the Missing Puffles

25 10 2009

I am currently doing mission walkthroughs in video form. The first is below, for Mission 1: Case of the the Missing Puffles.

Snowyowl

Edit: THE VIDEO HAS AUDIO NOW!

!


Mission 5: Secret of the Fur step-by-step guide

22 09 2009

Here are step-by-step instructions for completing Mission 5: Secret of the Fur on Club Penguin.

MISSION 5: SECRET OF THE FUR

1. Talk to Gary the Gadget Guy.

step 5.01

He ask you to take a look at the Furensic Analyzer 3000.

2. Click the Furensic Analyzer 3000.

You see a bit of puffle fur stuck in the analyzer.

3. From your spy phone, take the comb and use it to untangle the puffle fur so it can feed into the machine.

step 5.02

The analyzer matches the fur to a pink puffle.

4. Now, G asks you to scan the fur you found in mission 3.

5. Take the fur from G’s hand, and put it in the analyzer.

The analyzer reports it is an unknown specimen but is able to identify substances on the fur. The analyzer then finds traces of hot chocolate, hot sauce, and jet-pack fuel on the unknown fur sample.

6. G tells you to find larger samples of the elements found on the fur so he can use them to calibrate his special goggles.

7. Before you leave, go to the other side of the Gadget Room, grab the AC 1000 from the Prototypes shelf, and put it in your inventory. You need it in a bit.

8. Now, go to the Coffee Shop in Town for the hot chocolate.

You find a mess in the shop.

step 5.06

9. Ask the barista behind the counter what happened.

He tells you about a “big, strange, angry thing” he saw. He drew a picture of it and shows it to you.

step 5.07

10. Click the drawing he puts on the counter to see the monster.

11. Talk to the barista again, and ask him for some hot chocolate.

12. He tells you he can’t make you a cup: The shop’s hot-chocolate machine is broken.

13. Click the hot-chocolate machine behind the barista.

14. In your inventory, click your spy phone and grab your wrench.

15. Use the wrench on the milk hose over on the left to reattach it to the machine.

step 5.13

16. Put your wrench away, and click the Cold/Hot dial on the right side of the machine to move the dial from Cold to Hot.

Step 5.14

17. Take the mug from the top of of the machine, and put it under the hot-chocolate spout.

18. Press the Hot Chocolate button, and you discover you need chocolate sauce.

19. Head over to the Pizza Shop in the Plaza.

It’s a mess too!

20. Ask the pizza chef what happened.

He tells you he also saw a “really hairy, mutant crab!”

21. Ask him if you could take a sample of the hot sauce and the chocolate sauce.

step 5.19

22. Put the two sauces in your inventory.

23. While you are in the Pizza Shop, ask the chef if you can give him a hand with anything.

He asks you to deliver a pizza to a penguin fishing behind the Ski Lodge.

24. Take the pizza box from the counter, and put it in your inventory.

step 5.22

25. Go to the Ski Lodge in the Ski Village, head out the back door of the lodge, and deliver the pizza to the penguin fishing behind the lodge.

26. Return to the Coffee Shop.

27. Click the hot-chocolate machine.

28. Take the chocolate sauce in your inventory, and pour it in the Insert Chocolate funnel on top of the machine.

29. Press the red button for hot chocolate, and—tah dah!—hot chocolate fills the mug!

30. Put the mug of hot chocolate in your inventory.

31. Go to the Lighthouse at the Beach.

32. While you are in the Lighthouse, take the rope on the boat …

step 5.31a

… and the fishing net beside the wooden steering wheel …

step 5.31b

… and put them in your inventory. You need them later.

33. At the foot of the stairs, you find two startled penguins. Talk to them.

34. Head up the stairs to the Beacon.

35. Take the AC 1000 from your inventory, and click it on the floating jet-pack-fuel can to blow the red can toward you.

step 5.34

36. Take the scissors from your spy phone, and snip the balloon string on the fuel can.

37. Return the scissors to your spy phone, and put the fuel can in your inventory.

38. Return to HQ, go in the Gadget Room, and talk with G.

39. Tell him you have found all the elements.

40. From your inventory, pour the hot chocolate, the hot sauce, and the jet-pack fuel in the funnel on the left side of the calibration machine.

step 5.39

41. Now, take the goggles from the calibration machine and put them in your inventory.

Click the tracking goggles in your inventory to wear them and to turn them on and off.

42. With the goggles turned on, track paw prints from the Pizza Shop, through the Snow Forts, to the Coffee Shop, past the Dock, to the Lighthouse, and finally to the Ski Lodge.

step 5.41

43. Enter the Ski Lodge.

There, the penguin you delivered the pizza to is hiding under the couch cushions.

44. Talk to him.

He tells you he almost caught a gigantic fish, but he saw a giant shadow behind him and decided to hide inside the Ski Lodge.

45. While you are in the Ski Lodge, take the candle from the candleholder to the left of the couch and put it in your inventory. You need it in a bit.

step 5.44

46. Go out the back door to the fishing hole.

You see the shadow of the monster and overhear him say he is cold and needs a candle. You can turn off your goggles, if you want.

47. In your inventory, put the rope on the fishing net to create a trap.

48. Hang the trap on the tree limb.

49. From your inventory, put the candle in the trap.

The crab scuttles over and gets caught in the trap. The monster, however, runs away.

50. Put the tuft of fur the monster left behind in your inventory.

step 5.49

51. Put the captured crab in your inventory.

52. Return to HQ, go in the Gadget Room, and talk with G.

53. Tell him about what you caught, and hand him the crab.

54. Talk to G again, and put the tuft of fur you found in the Furensic Analyzer 3000.

You find out that the tuft of fur came from a ….polar bear!

55. Now talk to G again.

You’re done!

Did I miss anything?

Note: Some time ago, we translated the code that flashed by on the Furensic Analyzer 3000 in this mission. See this post to learn what the code says. The messages are funny 🙂

If you want to see how to do other secret agent missions, go to our Mission Guide page: https://abominablegovernment.wordpress.com/psa-mission-guides/.

Waddle on!

Mr Snowball3


Mission 7: Clockwork Repairs step-by-step guide

21 04 2008

The new Club Penguin Secret Agency mission came out today! It is called Clockwork Repairs.

Here are step-by-step instructions for completing Mission 7: Clockwork Repairs.

MISSION 7: CLOCKWORK REPAIRS

1. Talk with Gary the Gadget Guy.

He tells you about the broken Clock Tower, which is causing other clocks on the island to go haywire.

2. Click the monitor of the Snow Forts G points to.

You see the polar bear and crab you learned about in Mission 5 removing the prime gear and target-winder from the Clock Tower. You also see a spring flying off toward the Iceberg.

3. Talk to G again.

He asks you to repair the clock. You need to find the missing spring and target and make a new gear.

4. Before you leave, go to the other side of HQ and click in the middle of the Invention Cabinet.

You see a combination lock using secret-agent code.

5. Go back to G, and tell him you need to use the Electromagnet 2000.

He tells you the password is key.

6. Go back to the cabinet, and click it.

You see the lock again.

7. Using secret-agent code (you can find the code in the bottom-right corner of your screen), click the up and down arrows to set the lock combination to the letters k e y. See the picture below for the correct code:


The combination lock opens.

8. Grab the Electromagnet 2000, and put it in your inventory.

9. Now, go in the Gadget Room.

10. Look around for the shelves, grab the life-preserver ring off the top shelf, and put it in your inventory.

(If you want to learn more about how to repair the clock, go to the Snow Forts and talk with Rory, the penguin standing in front of the Clock Tower.)

11. Go to the Iceberg.

On the Iceberg, you see the spring, frozen in a large ice cube floating in the water.

12. From your inventory, take the Electromagnet 2000, and click it on the ice cube to pull it out of the water.

13. Put the ice cube and the Electromagnet 2000 in your inventory.

14. Head to the Ski Village, and talk with the two penguins about the physical properties of snow.

15. Go to the Beach next.

16. Talk to the yellow penguin sitting in the fancy snow chair.

He tells you his specially made chair was crafted by a yellow puffle.

17. Take the green bucket by the yellow penguin, and put it in your inventory.

18. Now, go to the Dock, and talk with the two penguins in blue-team uniforms.

They tell you how they got the Clock Tower target.

19. Ask if you can have the target.

They will give you the Clock Tower target if you can hit it with a snowball three times.

20. To hit the target, click and hold your mouse button to build up the power to sling a snowball.

21. Aim a little ahead of the target, and click your mouse button again to throw a snowball.

You get ten snowballs. If you don’t hit the target three times, try again.

22. Talk to the penguins after you hit the target three times, and they give you the target.

23. Put the target in your inventory.

24. From your inventory, grab the life-preserver ring and give it to the penguins so they can keep practicing.

25. Go to the Town.

26. Talk to Rookie, the agent you met in Mission 3.

He is handing out posters for the missing Clock Tower gear.

27. Tell him you’ve been looking for a picture of the gear.

He offers you a poster.

28. Click the poster he hands you, and put it in your inventory.

29. Go to the Snow Forts.

30. Take the green bucket from your inventory, and scoop up some snow.

31. Put the bucket of snow in your inventory.

32. On to the Plaza, and go in the Pizza Parlor.

33. Put the sheet of music by the piano in your inventory.

34. Go to The Stage.

35. Take the sheet of music from your inventory, and put it on the piano.

You see a yellow puffle peek out from behind a curtain.

36. Play the song on the sheet music, matching the colored notes on the sheet to the colored piano keys.

The yellow puffle comes out.

37. Click to the left or to the right of the screen to exit the close-up view of the piano.

38. From your inventory, take the poster and give it to the yellow puffle.

39. Now from your inventory, take the bucket of snow and give it to the puffle.

The puffle makes a gear out of snow!

(If you give the puffle snow from anywhere but the Snow Forts, the gear will fall apart after the puffle builds it.)

40. Put the bucket back in your inventory.

41. Put the gear in your inventory.

42. Head back to HQ, go in the Gadget Room again, and look for the Test Chamber.

43. Take the ice cube from your inventory, and place it on the right side of the conveyor belt of the Test Chamber.

44. Click the red handle near the bottom to move the ice cube into the chamber.

45. Press the fire button on the right.

You melt the ice.

46. Click the red handle again to move the spring out of the chamber.

47. Put the spring in your inventory.

48. From your inventory, take the snow gear and place it on the conveyor belt.

49. Click the red handle to move the gear into the chamber.

50. Press the red snowflake button on the left.

You superchill the gear.

51. Click the red handle to move the gear out of the chamber.

52. Put the gear back in your inventory.

53. Go to the Snow Forts.

54. Click near the bottom of the Clock Tower.

You see the clockwork.

55. From your inventory, take the spring and put it in the clockwork:

56. Now from your inventory, take the gear and put it in the clockwork:

57. Finally, from your inventory, take the target and put it on the winding arm to the left of the Clock Tower:

The clock is running now.

Your spy phone rings.

58. Answer your spy phone.

It’s the polar bear!

Now G walks out and says you’ve done excellent work.

59. Talk to G.

60. Be sure to get your medal and gift.

You’re done!

Did I miss anything?

(If you want to see how to do the other secret agent missions, go to our Mission Guide page: https://abominablegovernment.wordpress.com/psa-mission-guides/.)

Waddle on!

~Mr Snowball3~

Note: Here’s my favorite part of the mission 🙂


Mission 3: Case of the Missing Coins step-by-step guide

21 02 2008

Here are step-by-step instructions for completing Mission 3: Case of the Missing Coins on Club Penguin.

MISSION 3: CASE OF THE MISSING COINS

1. Talk to the new secret agent.

talktonewagent.png

The agent tells you what happened. He then closes the vault door.

2. Go in the door to the Gift Shop manager’s office.

goupstairs.png

3. Look around the room till you see the couch.

couch.png

4. Click under the couch.

diskandclip.png

5. Put the paper clip and BOOT computer disk in your inventory.

6. Look around for the computer.

computer.png

7. Click the computer.

8. Turn the computer on.

9. Take the computer disk from your inventory, and put it in the computer.

diskinslot.png

10. On the screen, click My Files.

11. Click Combination_Number.

combinationnumber.png

12. Write down the letters and the numbers next to the letters.

The numbers change each time you do the mission, so you need to write them down.

(If you want, you can also play the Ice_Bricks game on the computer!)

13. Go back downstairs.

backdownstairs.png

14. Click the vault door.

15. Click the vault handle to enter the combination numbers you wrote down.

combination.png

The number next to N goes on top, the number next to E goes on the right, the number next to S goes on the bottom, and the number next to W goes on the left.

16. Click the red CONFIRM button.

The vault door opens.

17. Go in the vault.

18. Talk to the new secret agent again.

Your spy phone rings.

19. Click your spy phone in your inventory.

cellphone.png

G tells you to meet him in HQ.

20. Click the Visit HQ button on your spy phone to go to see G.

21. Talk to G, who tells you about what he’s found.

22. Click the screen G is pointing at to see the video.

watchthisscreen.png

23. After you watch the video, talk to G again.

24. Say “OK. Do you have any suggestions?”

G tells you to look on the roof.

25. Click “Ok thanks G. Is there anything else I need to know?”

26. He tells you to take the key marked rooftop from a drawer.

27. Click the drawer.

28. Put the key in the top-left corner in your inventory.

keysindrawerline.png

The key says roof top in secret-agent code. (The other keys say lounge, ski shop, office, boiler room, and coffee, but you don’t need to use any of them in the mission.)

29. Go back to the Gift Shop, and go up to the manager’s office again.

30. Take the key from your inventory, and open the door to the roof.

keyondoor.png

31. Put the key back in your inventory, and go out to the roof.

A giant magnet!

powabox.png

32. Take your spy phone from your inventory, and click the flashing red button near the top.

33. Click the wrench that comes out.

34. Click the wrench on the front of the Powa Box.

wrenchonbox.png

It unbolts the front of the Powa Box.

35. Put the wrench back in spy phone.

36. Take the paper clip from your inventory, and put it in the Powa Box.

It shorts out the Powa Box and deactivates the magnet.

37. Put the tuft of white fur stuck in the vent on the left in your inventory.

furinvent.png

38. Go downstairs to the vault.

The coins have fallen to the ground. You can go in the vault and click the coins to talk with the new agent again.

39. Go back to HQ, and talk with G.

40. When G asks if you found anything else, tell him you found white fibers.

41. From your inventory, give G the white fur.

G then asks you if you are interested in another small mission.

42. Say “Sure, what is it you need me to do?”

He tells you to go to the Boiler Room and reset the fuses to turn back on the power.

43. Don’t leave HQ yet!

44. Move to the right till you see the map of Club Penguin.

45 Put the flashlight on the table in your inventory.

46. Use your spy phone or the map in the top-left corner to teleport to Town.

47. Talk to the brown penguin.

cryingpenguin.png

48. Go in the Night Club.

It is dark.

roomdark.png

49. Click the flashlight in your inventory to turn it on.

flashlightroom.png

If you are a member, you can click your night-vision goggles in your inventory instead.

goggleroom.png

50. Go to the right till you see the speaker with the secret entrance to the Boiler Room.

speaker.png

51. Click the speaker to go to the Boiler Room.

52. Look around till you see the Fuse Box.

fusebox.png

53. Click the fuse box.

54. If you are using your goggles, turn them off.

The flashlight turns off automatically.

fuseboxinside.png

55. Click the fuses till they all turn green.

This can take a while. Be patient, and keep clicking. I’ve sometimes got it in 5 tries, and sometimes it seems like it took 5 minutes. Don’t give up!

(If you absolutely can’t turn all the fuses green, you can go back to HQ and ask G to do it for you. But you won’t get the thank you card at the end.)

56. After you turn on the lights, go back up to the Dance Club and talk with the brown penguin again.

57. Now go back to HQ and talk to G.

58. Be sure to get your medal of excellence and thank you card.

medalandcard.png

You’re done!

Did I miss anything?

(If you want to see how to do the other secret agent missions, go to our Mission Guide page: https://abominablegovernment.wordpress.com/psa-mission-guides/.)

Waddle on!

~Mr Snowball3~